Mango Animation Maker provides Audio Editor for you to easily achieve many settings towards audios, you can copy, cut out, mute, delete and so on. Let’s learn more about it.
How to open Audio Editor?
You can select the audio element on the timeline then click “Edit Sound”; or you can double click the audio element to open the editor.

There are five components of Audio Editor.

1. Audio edit panel. You can drag the yellow and red dots to select sections of the audio for further edit.

2. Toolbar. The main functions of the Audio Editor are: mute, cut out, copy, paste, split and delete.

<1> Mute
a. Drag the two dots to select an area, or directly type the exact start time and end time to locate the area, and then click “Mute”.

b. If you want to cancel the mode of mute, just click “Redo”.
<2> Cut out
Drag the two dots to select an area, and then click “Cut out”, the audio will be shortened.

<3> Copy and Paste
Select an area, and then click “Copy”. You can paste it to other area to replace; or you can extend the total duration and paste it at the last position.


<4> Split
When the two dots overlap together (click anywhere of the audio edit panel), “Split” will occur on the toolbar. Click “Split”, and then the audio will be split into several parts as you want. So you can make adjustment to each part.

<5> Delete
Select an area, and then click “Delete”, or press on “Delete” on the keyboard.

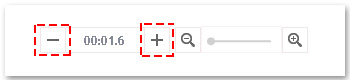
3. The total duration of the audio.
You can click “+” or “-” to increase or decrease the duration of the audio.
4. Play the audio. You can also adjust the volume. Type the exact start time and end time to locate the area that you want.

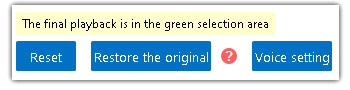
5. Reset and Restore.
<1> Reset: Go back to the first condition of editing.
<2> Restore: Go back to the original condition.